Wildcard TLS Certificates for Your LAN
for the impatient, skip to the how-to
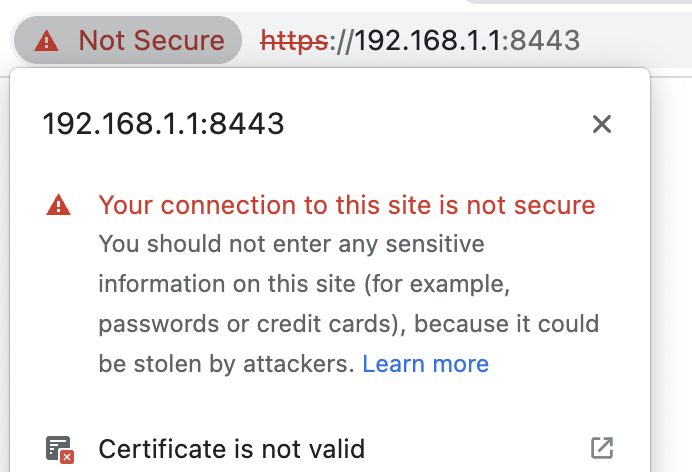
This article explains how to get a TLS Certificate for your LAN so you can use https:// and not have to ignore these “⚠️ Your connection is not secure” errors:
The reason that the browser throws this error is that TLS (and SSL before it) were designed to perform two functions:
- Authenticate the website to the user (prove it is really that site, and not a MITM) and
- Secure the contents of the data that flows between the user and the website
When you ignore this https error you are forgoing function #1, authentication, but you still get #2. So this is safe behavior if you are on your LAN and you are confident that someone else on your LAN is not trying to MITM you.
There are other practical downsides to not having a trusted TLS certificate, tools like kubectl have to be overridden with kubectl --insecure-skip-tls-verify. Also, it’s aesthetically pleasing to have a nice lock in the address bar instead of a scary exclamation triangle.
How to
First, buy a domain name for your personal LAN. I chose lehman.house but any domain will do. Second, make sure your router has the ability to forward incoming traffic to port 80 and 443. This is so that LetsEncrypt, a trusted free Certificate Authority, can verify that you control the domain.
Once you have purchased your domain, create two DNS type-A records, one for the domain and one wildcard subdomains.
| Type | Host | Answer | TTL |
|---|---|---|---|
| A | *.lehman.house | 123.321.55.73 | 300 |
| A | lehman.house | 123.321.55.73 | 300 |
Where you change Host to your domain, and Answer to your router’s IP. You can find your router’s IP by Googling “What is my IP?”. If you use OpenWRT, then you can ssh into your router and run:
# get public IP address of OpenWRT router
ifstatus wan |  jsonfilter -e '@["ipv4-address"][0].address'
Then, set up a Linux machine to run certbot, and follow the instructions. If you want a good default, choose “My HTTP website is running nginx on Ubuntu 20”.
If you want a quick webserver, ssh into your Ubuntu 20 machine and sudo apt install nginx, double check that it’s installed and running by running systemctl status nginx, if it says active (running)
, then you are good. Double check that the webserver is working by trying to visit http://$UBUNTU-IP where $UBUNTU-IP is the IP address of the ubuntu machine on your LAN, those IPs are not public, and they usually start with 192. or 10.
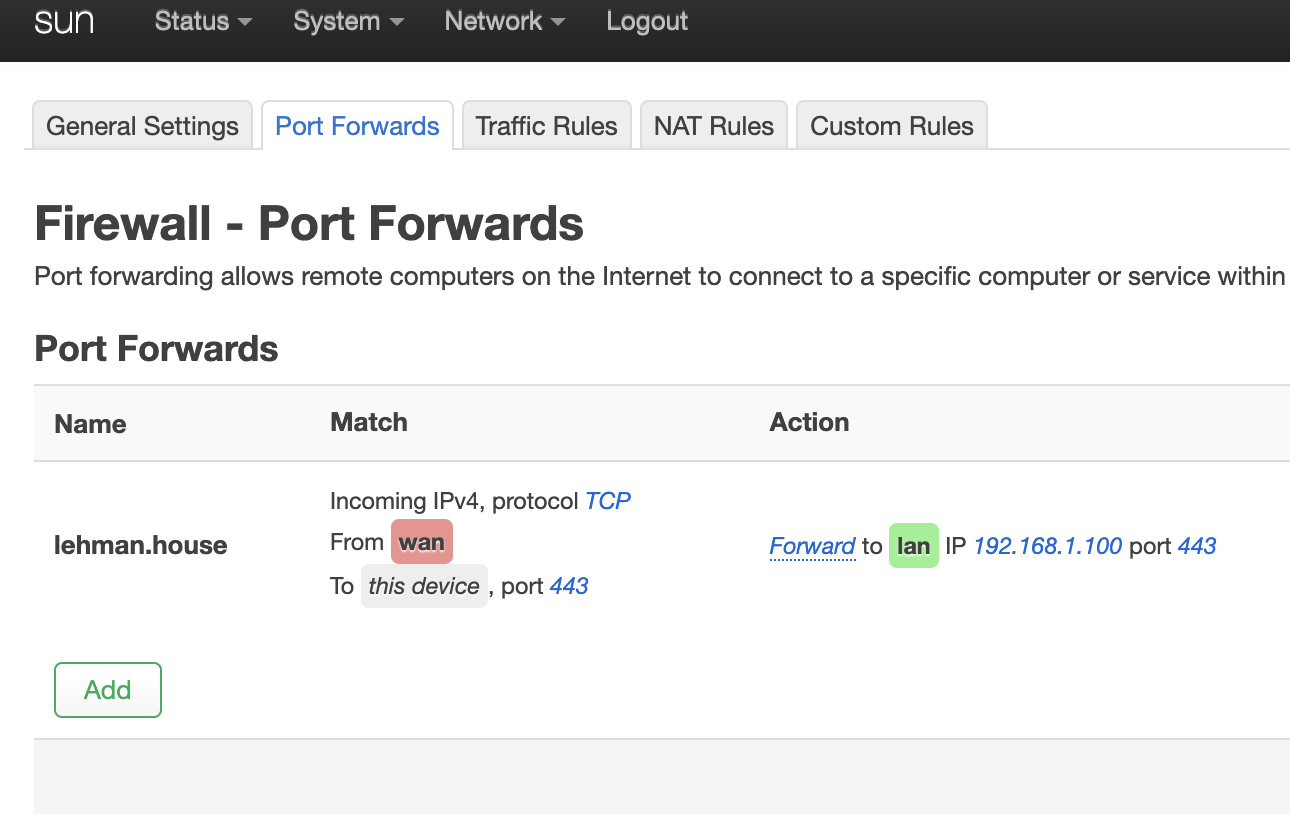
Now, temporarily open up port 80 (for http) and 443 (for https) on your router. This will be a Port Forwarding rule that forwards TCP connections from your Public IP to the Private IP of your Ubuntu machine.
If you are using OpenWRT on your router, the forwarding rule will look like this:
Now you need to request the certificates, ssh into your Ubuntu machine and run
export $DOMAIN=lehman.house # change this

sudo certbot certonly --manual -d *.$DOMAIN -d $DOMAIN --agree-tos \
  --manual-public-ip-logging-ok \
  --preferred-challenges dns-01 \
  --server https://acme-v02.api.letsencrypt.org/directory \
  --register-unsafely-without-email \
  --rsa-key-size 4096
The --preferred-challenges dns-01 will generate a “DNS challenge”, where you will have to create a DNS TXT record with the unique value that cerbot generates for you. Once you create this TXT record, certbot can finish verification. Certbot then installs the certificates for you.
Those certificates will live in /etc/letsencrypt/live/$DOMAIN/ as symlinks:
- cert.pem
- chain.pem
- fullchain.pem
- privkey.pem
Follow the symlinks with ls -l and get the files, you can then copy them to other devices on your LAN.
Remember to disable the Port Forwarding Rule if you don’t want to maintain and harden an endpoint on the internet. You can now use this wildcard certificate for any subdomain on your LAN.
How to get cool names
I used OpenWRT, since it has a DNS server that runs on it and you can create custom DNS rules like:
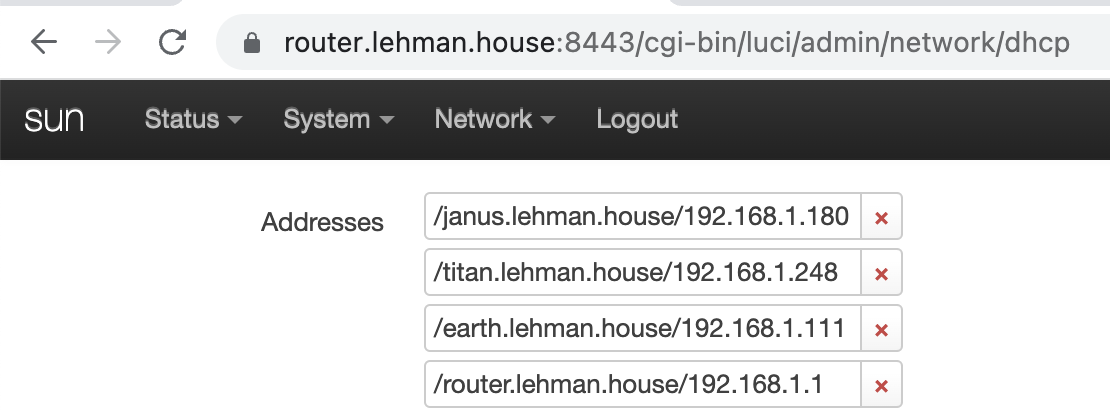
But if you aren’t using OpenWRT, you can still point your computers at a custom DNS server, the Pi-Hole project is one option if you have a spare Raspberry Pi laying around, or you can even add custom DNS rules to your computer by editing the /etc/hosts file.
Once you can reach computers on your LAN using a subdomain of your domain, and that server is configured to serve up your certificates, then your browser and kubectl will be able to use HTTPs without having to override the safety warning.
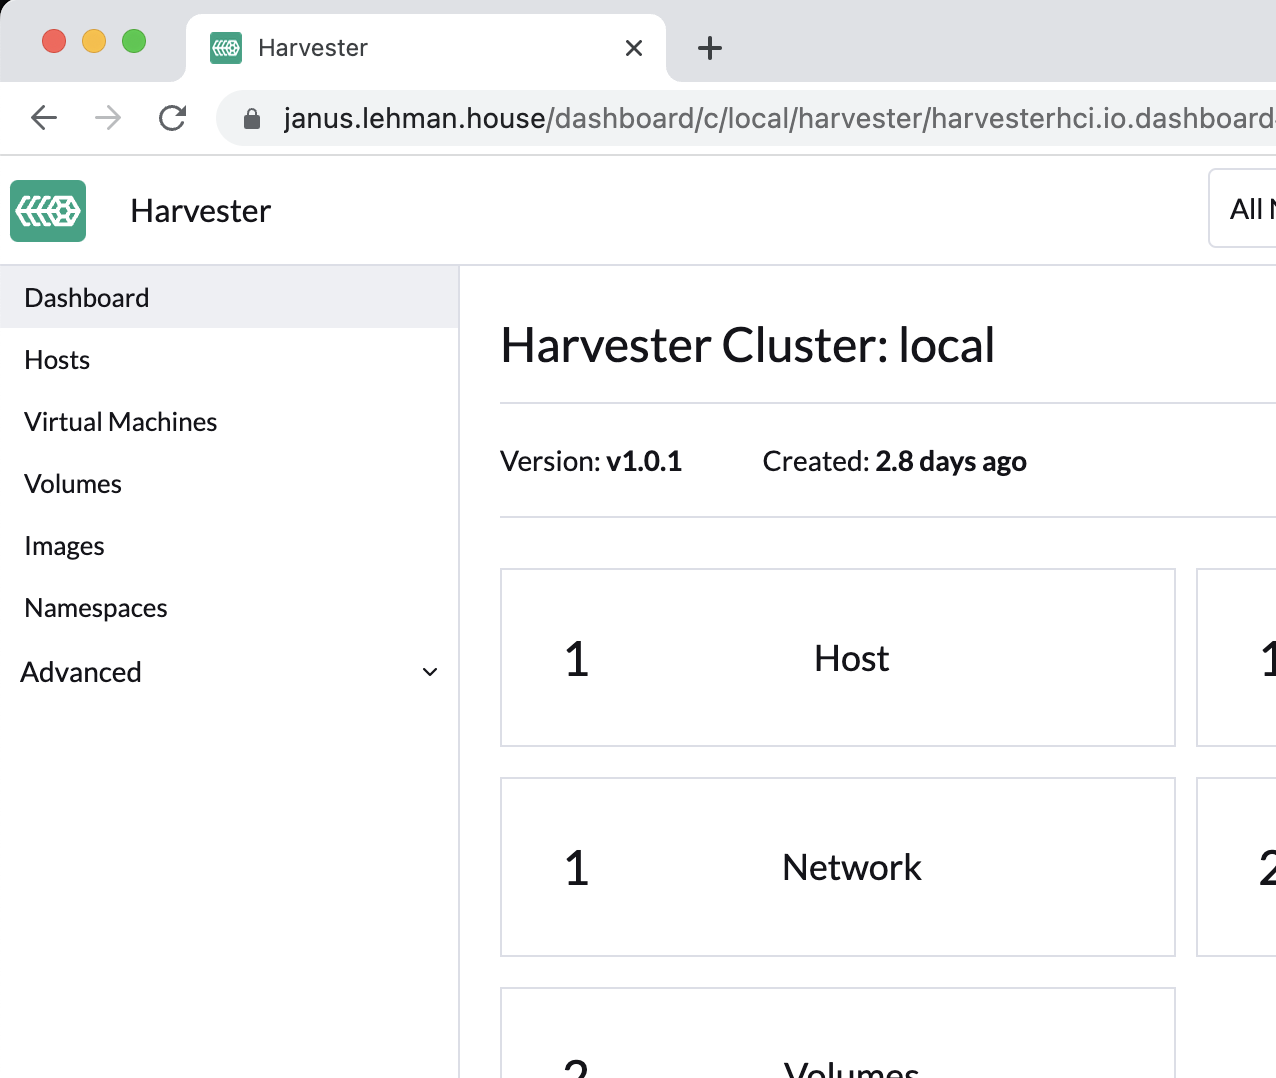
For example, I work on Harvester, a Kubernetes-based cluster operating system that supports virtualization. By setting the ssl-certificates setting, I can access the UI and have a valid certificate for both browsing and command line operations: